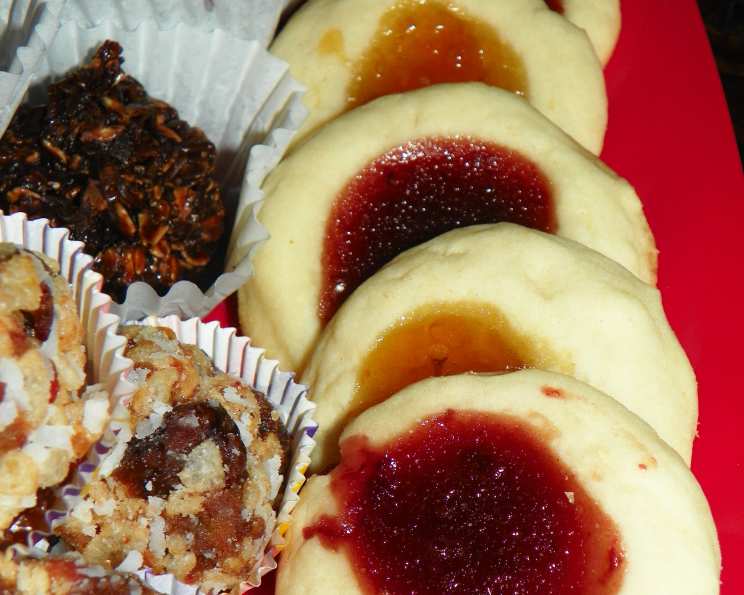
Bachelor Buttons (Cookies)
Recipe featured on The Daily Meal — All Things Food and Drink. In 1820, Missouri enacted legislation to tax bachelors between 21 and 50 years of age $1 per year for being unmarried. Bake these cookies that look like buttons — or are they flowers? Either way, they’re easy, and cute enough to serve at a party. These delicate, melt-in-your-mouth cookies are as charming as they are delicious.
Ingredients
This recipe relies on simple, accessible ingredients. It’s the technique that elevates these humble cookies into something special. Remember, using high-quality ingredients will always yield the best results.
- 1 cup butter (salted or unsalted, your choice, at room temperature)
- ¾ teaspoon salt
- 1 cup powdered sugar
- 1 large egg
- 1 teaspoon vanilla extract
- 2 cups all-purpose flour
- ¼ cup fruit preserves (flavors of your choice)
Directions
The beauty of these Bachelor Buttons lies in their simplicity. Don’t be intimidated by the slightly fussy-sounding name; the process is quite straightforward.
Preheat the oven to 350 degrees Fahrenheit (175 degrees Celsius) and place a rack in the center. This ensures even baking and prevents the bottoms from burning.
Line baking sheet with parchment paper. Parchment paper prevents sticking and makes cleanup a breeze. No one wants to spend hours scrubbing cookie sheets!
In the bowl of a stand mixer fitted with a paddle attachment, or in a large mixing bowl, using a handheld electric mixer, beat the butter, salt, and powdered sugar on medium speed until creamy. The goal here is to achieve a light and airy mixture. Creaming the butter and sugar together properly is crucial for a tender cookie. Don’t rush this step! This process should take about 3-5 minutes.
Reduce the mixer speed slightly and beat in the egg and vanilla. Mix until just combined. Overmixing at this stage can lead to tough cookies.
By hand or using the lowest speed of the mixer, stir in the flour. Be careful not to overmix. Overmixing develops the gluten in the flour, resulting in a chewy, rather than tender, cookie. Mix until just combined. The dough should be smooth and slightly sticky.
Shape the dough into ¾-inch balls and arrange 2 ½ inches apart on the prepared baking sheet. Use your finger to make an indentation in the center of each dough ball, then fill with preserves. The indentation doesn’t need to be perfectly deep, just enough to hold a dollop of preserves. This is where the “button” effect comes into play.
Bake 1 sheet at a time for 10-12 minutes, or until the cookies are lightly browned around the edges. Keep a close eye on them! Ovens vary, and you don’t want them to burn. The edges should be golden brown, but the center should still be pale.
Let cool on the baking sheets for about 3 minutes, then transfer to a wire rack to cool completely. Allowing them to cool slightly on the baking sheet before transferring prevents them from breaking.
Quick Facts
{“Ready In:”:”17mins”,”Ingredients:”:”7″,”Serves:”:”16″}
Nutrition Information
{“calories”:”206.9″,”caloriesfromfat”:”Calories from Fat”,”caloriesfromfatpctdaily_value”:”107 gn 52 %”,”Total Fat 12 gn 18 %”:””,”Saturated Fat 7.4 gn 37 %”:””,”Cholesterol 42.1 mgn n 14 %”:””,”Sodium 216.8 mgn n 9 %”:””,”Total Carbohydraten 22.9 gn n 7 %”:””,”Dietary Fiber 0.5 gn 1 %”:””,”Sugars 9.9 gn 39 %”:””,”Protein 2.1 gn n 4 %”:””}
Tips & Tricks
Room Temperature Butter is Key: Ensure your butter is truly at room temperature. It should be soft enough to easily press with your finger but not melted. This is crucial for proper creaming and a tender cookie.
Don’t Overmix: Overmixing the dough, especially after adding the flour, will develop the gluten and result in tough cookies. Mix until just combined.
Chill the Dough (Optional): If your dough is too sticky to handle, wrap it in plastic wrap and chill it in the refrigerator for 30 minutes. This will make it easier to roll into balls.
Uniform Cookie Size: Use a small cookie scoop or a spoon to ensure that all the cookies are the same size. This helps them bake evenly.
Preserve Selection: Choose a variety of fruit preserves to create a colorful and flavorful assortment. Raspberry, apricot, strawberry, and fig preserves all work well. You can even use different flavors on the same baking sheet for a delightful surprise.
Baking Time Adjustments: Ovens vary, so keep a close eye on the cookies. If they are browning too quickly, reduce the oven temperature by 25 degrees.
Dust with Powdered Sugar (Optional): Once the cookies have cooled completely, you can dust them with powdered sugar for an extra touch of elegance.
Storage: Store the cooled cookies in an airtight container at room temperature for up to 3 days. They can also be frozen for longer storage.
Adding Flavor: Consider adding a pinch of almond extract or lemon zest to the dough for an extra layer of flavor.
Salted vs. Unsalted Butter: If using salted butter, reduce the amount of salt in the recipe by half.
Experiment with Extracts: Instead of vanilla extract, try almond extract, lemon extract, or even a touch of rosewater for a unique flavor profile.
Frequently Asked Questions (FAQs)
Can I use gluten-free flour for this recipe? Yes, you can substitute the all-purpose flour with a gluten-free blend. However, you may need to adjust the amount of liquid, so start with less and add more as needed until the dough comes together.
Can I make the dough ahead of time? Absolutely! You can make the dough up to 2 days in advance. Wrap it tightly in plastic wrap and store it in the refrigerator. Let it come to room temperature slightly before rolling into balls.
What if my dough is too sticky? If your dough is too sticky to handle, wrap it in plastic wrap and chill it in the refrigerator for 30 minutes. This will make it easier to roll into balls.
Can I freeze these cookies? Yes, you can freeze the baked cookies. Place them in an airtight container or freezer bag and freeze for up to 2 months. Thaw at room temperature before serving.
Can I use different types of fillings besides fruit preserves? Certainly! You can use chocolate ganache, Nutella, caramel, or even a dollop of cream cheese frosting.
What is the best way to prevent the cookies from spreading too much? Chilling the dough before baking helps to prevent spreading. Also, make sure your oven is at the correct temperature.
How do I know when the cookies are done? The edges of the cookies should be lightly browned, and the centers should be set but still slightly soft.
Can I use a stand mixer instead of a handheld mixer? Yes, you can use a stand mixer with the paddle attachment.
What if I don’t have parchment paper? You can grease the baking sheet with butter or cooking spray. However, parchment paper is recommended for easy cleanup.
Can I double the recipe? Yes, you can easily double or triple the recipe to make a larger batch.
What temperature should the butter be? The butter should be at room temperature, soft enough to easily press with your finger but not melted.
Why are my cookies dry? Overbaking is the most common cause of dry cookies. Make sure to bake them for the recommended time and check them frequently.
Can I add nuts or chocolate chips to the dough? Yes, you can add chopped nuts or chocolate chips to the dough for added flavor and texture.
What other flavors of extract can I use? Almond extract, lemon extract, and even a touch of rosewater are all excellent alternatives to vanilla extract.
Why are they called Bachelor Buttons? The name is a whimsical connection to the historical tax on unmarried men and the button-like appearance of the cookies, perhaps suggesting a “sweet” incentive for avoiding bachelorhood!
Leave a Reply